Bootstrap Checkbox Class
Introduction
From time to time the most basic things might probably become extremely critical-- most especially once you come to need them. As an example precisely how do your site visitors communicate with the pages you make claiming a simple Boolean act-- just yes or no pertaining to some of the thoughts you need to request, just how they do accept the conditions or else line up a handful of the attainable choices they might possess. We in most cases get past this without paying a lot of an attention to the element chargeable for such activities yet the Bootstrap Checkbox Switch is certainly a really serious feature-- one our forms cannot in fact do without.
Located in the most updated fourth edition of the Bootstrap system we are delivered with the
.form-check.form-check-label<div>.form-check.form-check-label<label><input>.form-check-inputTips on how to make use of the Bootstrap checkbox:
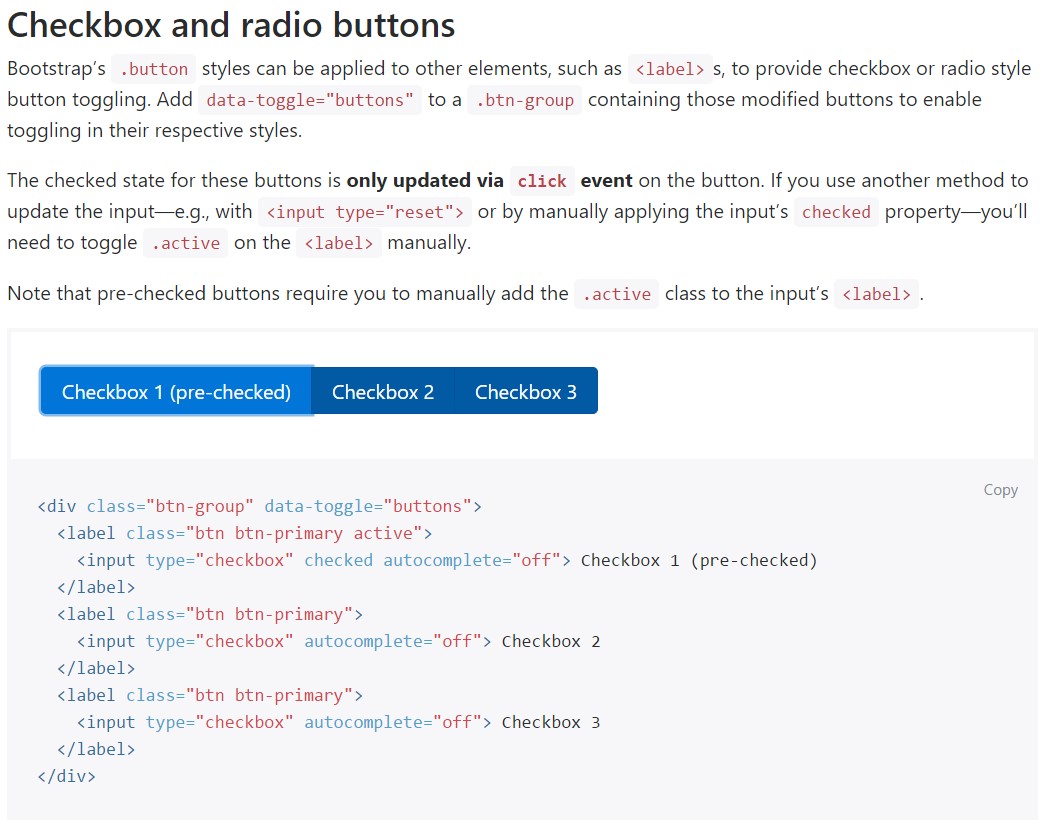
Bootstrap's
.button<label>data-toggle=" buttons".btn-group<input type="reset">.active<label>
<div class="btn-group" data-toggle="buttons">
  <label class="btn btn-primary active">
    <input type="checkbox" checked autocomplete="off"> Checkbox 1 (pre-checked)
  </label>
  <label class="btn btn-primary">
    <input type="checkbox" autocomplete="off"> Checkbox 2
  </label>
  <label class="btn btn-primary">
    <input type="checkbox" autocomplete="off"> Checkbox 3
  </label>
</div>
In certain cases we want to have the checkboxes to come inside our forms without the customer really being capable to make any type of activity selecting them-- that is simply where the disabled option comes out.
In order to disable effectively a checkbox in Bootstrap 4 using the basic HTML attribute
disabledIn the case that you appreciate the tip and clearly want to carry this out you really should designate the
.disabled.form-checkSome other scenario
Anytime working with checkboxes, wrap all of them in a
<label>.custom-control.custom-checkboxUse
.custom-control-input<input>Also apply two
<span>.custom-control-indicator.custom-control-description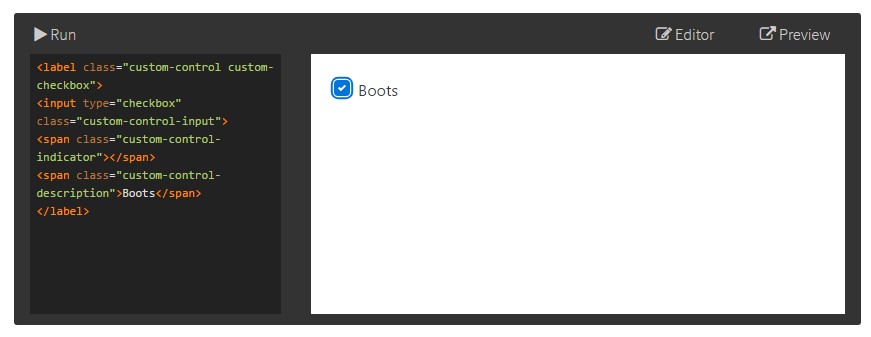
<label class="custom-control custom-checkbox">
<input type="checkbox" class="custom-control-input">
<span class="custom-control-indicator"></span>
<span class="custom-control-description">Boots</span>
</label>
Bootstrap Checkbox Form forms
Default checkboxes and radios are greatly enhanced upon with the assistance of
.form-checkThe disabled class is going to additionally light up the text message color tone to help signify the input's state.
A brand-new aspect for the Bootstrap edition 4 system is the arrival of the so called custom-made form features. These are actually the very same components we are knowing inside usefulness though designated a lot more interesting and in the Bootstrap method. Utilizing them you can incorporate fascinating taste and personality to your material via simply delegating a couple of special classes to the controls you involve in your forms.
To work with custom-made checkboxes wrap them inside a
<label>.custom-control.custom-checkbox<input>.custom-control-input<span>.custom-control-indicator.custom-control-descriptionFinal thoughts
That's basically all you have to complete in order to set a checkbox feature inside your Bootstrap 4 powered site and put in a number of custom-made flavor to it adding it a stylish looks. And now everything you ought to do is repeat the drill till you have actually examined all the checkboxes wanted are readily on the page.
Inspect a couple of video clip short training relating to Bootstrap checkbox
Connected topics:
Bootstrap checkbox main information
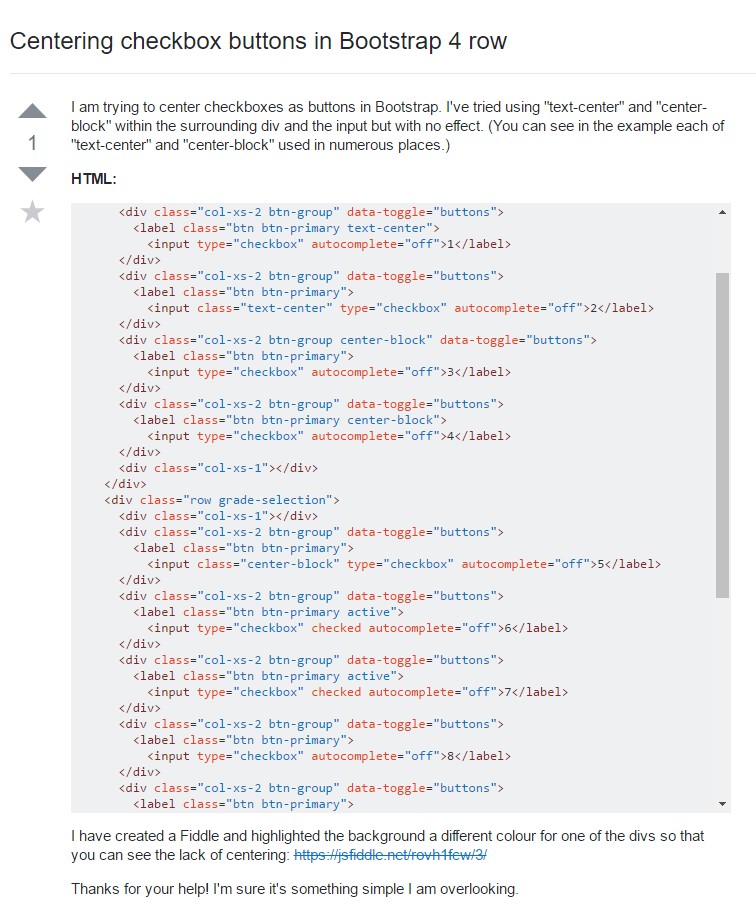
Centering checkbox buttons in Bootstrap 4 row
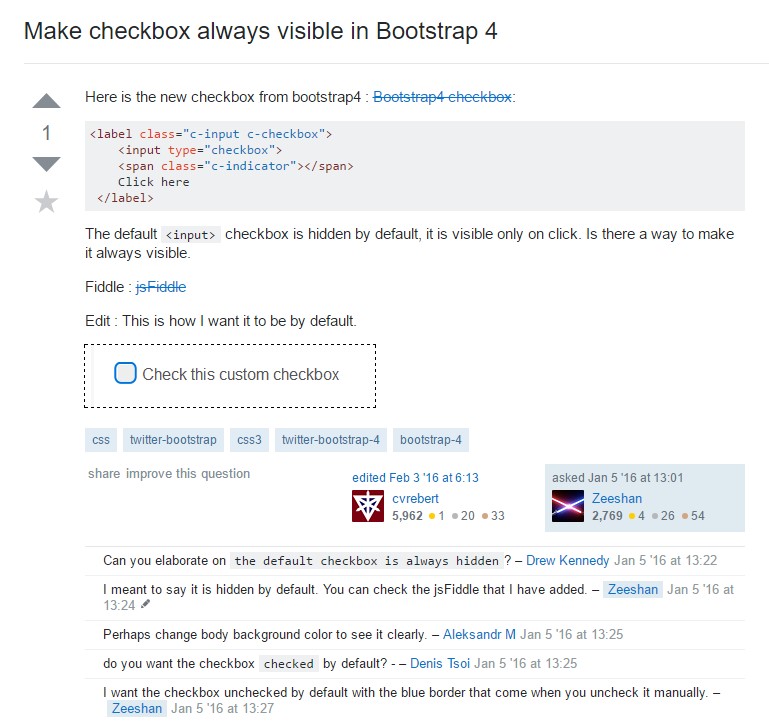
Make checkbox always visible in Bootstrap 4