Bootstrap Header Using
Overview
As inside of printed documents the header is one of the very most necessary elements of the web pages we receive and make to employ every day. It tightly possesses some of the most crucial information regarding the identification of the establishment as well as individual responsible for the web page itself and the essence of the whole site-- its navigation structure which together with the Bootstrap Header Form itself should be thought and crafted in this kind of way that a website visitor in a hurry or not really actually understanding which way to head to just take a glance at and discover the required information. This is the preferred circumstances-- in the real world obtaining as near as feasible to this visual appeal and behavior likewise goes since we nearly every moment have some project specified limits to think about. Additionally compared with the written documentations in the world of internet we should really always keep in mind the selection of attainable devices on which our webpages could possibly get showcased-- we ought to assure their responsive behavior or else to puts it simply-- ensure they will display ideal at any display size achievable.
And so let us have a glance and see precisely how a navbar gets generated in Bootstrap 4. ( learn more here)
Exactly how to employ the Bootstrap Header Form:
First off for you to generate a webpage header or else given that it gets knowned as in the framework-- a navbar-- we need to wrap the whole item inside a
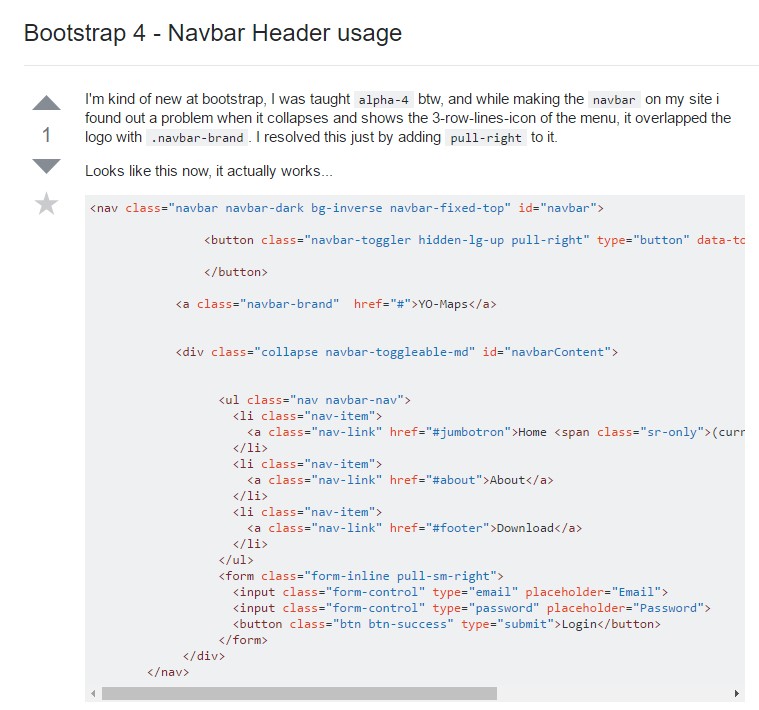
<nav>.navbar.navbar-toggleable- ~ screen size ~.bg-*.navbar-light.navbar-lightWithin of this parent element we should certainly start off by setting a tab feature which shall be employed to display the collapsed web content on a smaller sized display scales-- to do that make a
<button>.navbar-toggler.navbar-toggler-left.navbar-toggler-righttype = " button "data-toggle ="collapse"data-target = " ~ the collapse element ID ~What is truly bright new for current alpha 6 release of the Bootstrap 4 framework is that inside the
.navbar-togler<span>.navbar-toggler-icon<a>.navbar-brand<div class="img"><img></div>Now-- the necessary part-- generating the collapsible container for the primary site navigation-- to perform it build an element using the
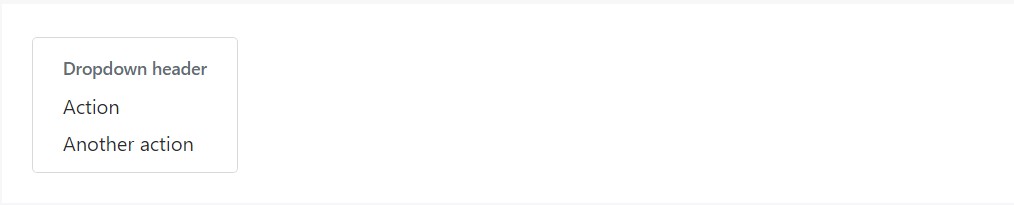
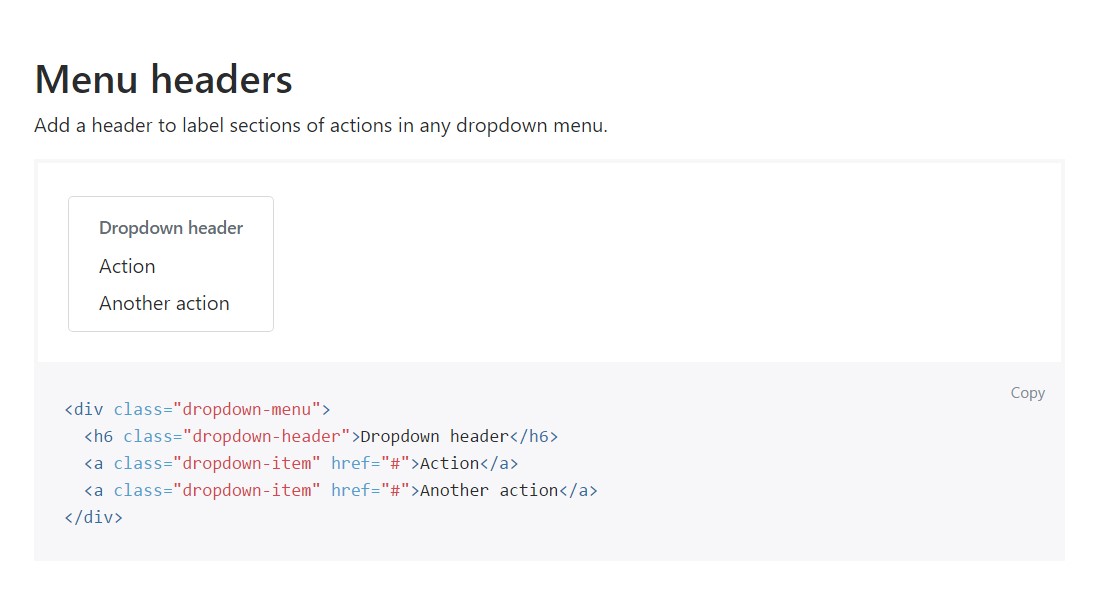
.collapse.navbar-collapseid =" ~ same as navbar toggler data-target ~ ".collapse<ul>.navbar-nav<ul><li>.nav-item<a>.nav-link.nav-item.nav-link.nav-item.dropdown<li>.dropdown-toggle.nav-link.nav-item<div>.dropdown-menu.dropdown-itemRepresentation of menu headers
Put in a header to label sections of actions in any dropdown menu.
<div class="dropdown-menu">
  <h6 class="dropdown-header">Dropdown header</h6>
  <a class="dropdown-item" href="#">Action</a>
  <a class="dropdown-item" href="#">Another action</a>
</div>
More capabilities
Yet another fresh item for this particular version is the option to include an inline forms in your
.navbar.form-inline<span>.navbar-textFinal thoughts
Whenever it comes down to the header items in the most recent Bootstrap 4 edition this is being actually cared for with the constructed in Collapse plugin and some navigation specified content classes-- a number of them created specifically for preventing your brand's identification and various other-- to get confident the actual web page navigational structure will reveal best collapsing in a mobile style menu when a specified viewport width is reached.
Check out several video information about Bootstrap Header
Linked topics:
Bootstrap Header: formal records
Bootstrap Header training
Bootstrap 4 - Navbar Header handling